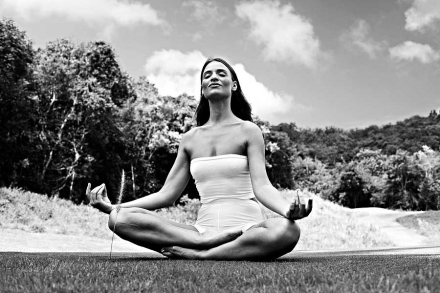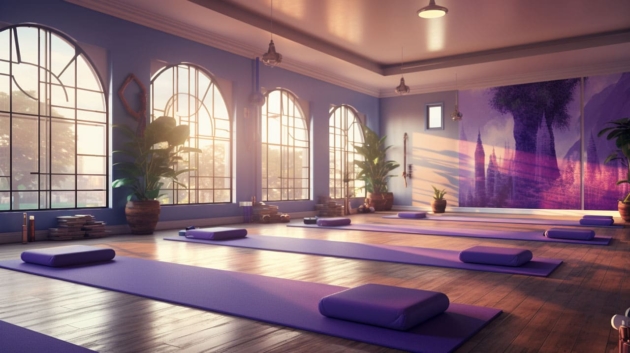
Hello there, fellow yoga enthusiasts! So, you’re looking to deepen your understanding of those essential yoga poses? You’re in the right place, my friend! This comprehensive guide has got your back (literally and figuratively), as it’s chock-full of tips, tricks, and techniques to master those fundamental positions. Whether you’re a beginner testing the yoga waters or a seasoned yogi looking to refine your practice, we’ll break down these yoga postures into bite-sized, easy-to-digest pieces.
We’re going to explore the essential yoga poses that form the foundation of any good yoga practice. After all, yoga isn’t just about touching your toes—it’s what you learn on the way down. So, take a deep breath and get ready to embark on this enlightening yoga journey.
Mountain Pose (Tadasana)
Let’s dive into the wonderful world of Mountain Pose (Tadasana). We’ll first explore its benefits, making your yoga practice even more rewarding. Then, we’ll guide you step-by-step on how to do Mountain Pose, ensuring that you nail it perfectly. We’ll also share some handy tips for doing Mountain Pose, to enhance your experience. If you’re a newbie, don’t worry! Our section on Tadasana for beginners will get you started. Finally, we’ll discuss how to seamlessly incorporate Mountain Pose into a yoga sequence. Ready to embark on this journey? Let’s get started!
Benefits of Mountain Pose
Let’s now ascend the metaphorical summit of the Mountain Pose, or Tadasana. One of the fundamental poses in yoga, it’s not just about standing still, there’s much more beneath the surface.
The Mountain Pose offers a multitude of benefits, which makes it a favorite among yoga practitioners. This powerful pose helps to improve your posture and balance, which can be particularly beneficial for those who spend long hours sitting at a desk. It is also a great pose for strengthening the knees, thighs, and ankles, promoting better mobility and overall body strength. What’s more, it can help to reduce flat feet and improve the body’s alignment.
Beyond the physical, Tadasana is also a wonderful way to connect with your breath and cultivate mindfulness. It’s like a mini-meditation that helps you to center and ground yourself, bringing a sense of calm and clarity. Remember, every mountain peak starts from the ground.
How to do Mountain Pose
As if the gentle, reassuring touch of nature sparks a connection within us, let’s explore the exquisite simplicity of the Mountain Pose or Tadasana. Here’s a step-by-step guide on how to do it:
Firstly, stand tall and proud like a mountain, with your feet hip-width apart. Feel your weight evenly balanced through your soles. Let your arms hang naturally by your sides. Breathe in, lift your chest, and roll your shoulders back. As you breathe out, let your body relax, but keep your spine straight and strong.
Next, focus on your feet. Spread your toes wide and root them firmly to the ground. Imagine energy flowing upward from the earth, through your legs, into your torso, and finally reaching your head.
Remember, your gaze should be straight ahead, your face relaxed, and your neck aligned with your spine.
Voila! You’re doing the Mountain Pose. Breathe deeply, enjoy the stillness, and feel your strength and stability. Remember, practice makes perfect!
Tips for Doing Mountain Pose
As we transition from the benefits of Tadasana to the practicality of it, let’s talk about some useful tips for efficiently executing the Mountain Pose.
Firstly, it’s crucial to stay grounded. Visualize your feet rooted into the earth providing a solid base for your body. Secondly, remember to breathe. The breath plays an essential role in yoga, and it’s no different with Tadasana. So, inhale and exhale deeply while maintaining the pose.
Another important tip is to engage your muscles. While standing, activate your thigh muscles and draw your abdominal muscles in and up. Lastly, always maintain a straight posture. Imagine a string pulling you up from the crown of your head towards the sky.
Remember, it’s okay if you don’t get it right the first time. The beauty of yoga lies in the journey of self-improvement and not perfect execution. Keep these tips in mind and soon you’ll be a Tadasana pro!
Chair Pose (Utkatasana)
In our journey through yoga, we encounter Chair Pose (Utkatasana), which offers numerous benefits. To experience these, knowing how to do Chair Pose is crucial. Novices shouldn’t fret, we’ll delve into Chair Pose for beginners. Remember, practice makes perfect, so we’re sharing some handy tips for doing Chair Pose. Finally, we’ll explore smoothly incorporating Utkatasana into your yoga flow. Let’s delve in!
Benefits of Chair Pose
Moving from the steadiness of Mountain Pose, let’s now discover the dynamic energy of Chair Pose, or Utkatasana. Utkatasana is a wonderful pose with numerous benefits that can invigorate your entire body. When done correctly, this pose can strengthen your thighs, ankles, and spine while stretching your shoulders and chest.
The Chair Pose is not only beneficial for your physical health, but it’s also a great way to stimulate your heart chakra, which can help you find balance in your emotional and spiritual life. Moreover, it improves your balance, and can even stimulate the abdominal organs, diaphragm, and heart, promoting overall health and wellness.
Engaging in Utkatasana regularly can also increase your body’s determination and stamina. It’s a great way to add a little bit of challenge to your routine, while also reaping the rewards of a healthier, stronger body. The Chair Pose, therefore, provides a comprehensive approach to fitness, making it a must-do for any yoga practitioner.
How to do Chair Pose
After embracing the grounding energy of Tadasana, let’s introduce some dynamic energy into our practice with Utkatasana, also known as Chair Pose. Here’s a friendly guide on how to do Chair Pose:
Begin by standing tall in Tadasana, with your feet hip-width apart. As you inhale, raise your arms above your head, palms facing each other. Exhale and bend your knees, as if you are sitting back into an invisible chair. Your thighs should be as parallel to the floor as possible. Keep your back straight and your chest lifted.
Feel the power in your legs. It might feel like a challenge, but remember, every chair pose you do is an opportunity to build strength and stamina. Keep your gaze forward and breathe deeply. After holding for a few breaths, straighten your knees on an exhale, lower your arms and return to Tadasana.
Remember, it’s okay to wobble. Yoga is a journey, not a destination. Stay cheerful and keep practicing!
Tips for Doing Chair Pose
Transitioning from the solid grounding of the Mountain Pose, let’s now challenge our balance and strength with the invigorating Chair Pose. When it comes to Utkatasana, as it’s known in Sanskrit, there are several helpful tips to keep in mind.
Firstly, always ensure that your feet are parallel to each other, about hip-width apart. This is the foundation of your ‘chair’. Secondly, as you bend your knees, focus on sitting back as if there were a chair behind you, rather than simply bending forward. This helps engage your thighs and glutes properly. Monitor your breath, as it can be easy to hold it when this pose gets challenging! Try to maintain smooth, deep breaths throughout.
Remember to keep your back straight, not rounded, and your chest lifted. The aim is to create a straight line from your head to your tailbone. Lastly, don’t forget to smile. Yoga is not just about physical exercise, but also about finding joy in movement. Happy practicing!
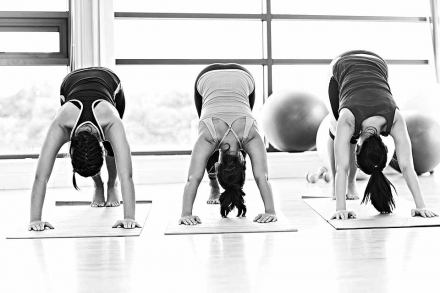
Downward-Facing Dog (Adho Mukha Svanasana)
Embrace the numerous benefits of Downward-Facing Dog to enhance your yoga practice. To get started, we’ll walk you through how to do Downward-Facing Dog with precision and grace. For a seamless experience, we’ll provide tips for doing Downward-Facing Dog efficiently. If you’re a beginner, don’t worry! We’ve got modifications for beginners to ensure comfort and safety. For those ready to challenge themselves, we’ll explore some exciting advanced variations of this pose. Let’s dive into the world of Adho Mukha Svanasana together!
Benefits of Downward-Facing Dog
Flowing from the strength-building Chair Pose, we now transition to a pose that offers both rejuvenation and an invigorating stretch – the Downward-Facing Dog. This classic yoga pose holds a multitude of benefits, making it a staple in many yoga routines.
Downward-Facing Dog is known for its ability to energize the body and calm the brain, making it a fantastic stress reliever. It can also improve digestion and help relieve back pain, as it stretches the shoulders, hamstrings, calves, arches, and hands. This pose also strengthens the arms and legs, and because the heart is higher than the head, it is considered a mild inversion which can improve circulation.
Regular practice of this pose can also help with symptoms of menopause, prevent osteoporosis, and reduce fatigue. So, if you’re looking for a pose that can help boost your mood while strengthening your body, the Downward-Facing Dog is a great option to consider.
How to do Downward-Facing Dog
Transitioning from the empowering Chair Pose, let’s explore another foundational asana: the Downward-Facing Dog. This pose mimics the stretch of a dog waking from a nap, hence its playful name.
To perform the Downward-Facing Dog, start on your hands and knees. Make sure your wrists are directly under your shoulders, and your knees are directly under your hips. Breathe out as you lift your hips, coming onto your toes. Gradually, try to straighten your legs and push your heels toward the floor. Don’t worry if your heels don’t touch the floor—this will come with time!
Your body should be forming an inverted ‘V’. Press your palms firmly into the mat, keeping your head between your upper arms. Don’t forget to draw your shoulder blades down towards your hips.
Remember, this pose is a resting pose for many yogis, so it’s okay to linger here. Take five to ten deep breaths before gently releasing the pose.
Tips for Doing Downward-Facing Dog
From the intensity of the Chair Pose, we now transition to the rejuvenating Downward-Facing Dog. Its calming nature captures the essence of a playful pup stretching itself after a deep slumber. Now, let’s discuss some tips for doing Downward-Facing Dog.
To start, always prioritize alignment over depth. It’s not about how low you can go, but how well you maintain the form. Try to create an inverted ‘V’ with your body rather than a ‘U’. Next, remember to engage your core. This will not only improve your strength but also protect your lower back. Also, equally distribute your weight between your hands and feet. This helps to avoid straining your wrists or ankles.
For beginners, it’s okay if your heels don’t touch the ground at first. With regular practice, your hamstring flexibility will naturally improve. Lastly, don’t forget to breathe deeply and relax. Yoga is a journey, not a destination. Enjoy the process!
Warrior I (Virabhadrasana I)
Let’s delve into the wonderful world of Warrior I (Virabhadrasana I). First, we’ll explore the benefits of Warrior I, detailing how this pose can enhance your yoga practice. Then, we’ll guide you step-by-step on how to do Warrior I correctly. We’ll also share some tips for doing Warrior I to help you get the most out of this pose. Then, we’ll highlight some common mistakes in Warrior I to watch out for. Lastly, we’ll discuss modifications for Warrior I to accommodate different fitness levels.
Benefits of Warrior I
Moving from the humble grounding of Downward-Facing Dog, let’s step into the power and strength embodied in Warrior I, or Virabhadrasana I. This posture holds a multitude of benefits that extend beyond physical fitness.
Warrior I is like a confidence-boosting tonic for your body and mind. It strengthens your legs, opens your hips, and helps to improve your balance and stability. This pose stimulates your core and lower body, leading to toned muscles over time. Not just that, it’s a heart-opening pose too, which means it helps to reduce stress and anxiety, promoting a sense of calm.
The posture also aids in improving your body’s flexibility and alignment, making it easier for you to perform other yoga poses. And if you’re looking for a pose to help with focus, Warrior I is your perfect companion. It encourages concentration and determination, helping you stay grounded in the present moment. Now, isn’t that a pose worth practicing?
How to do Warrior I
Shifting from the relaxing Downward-Facing Dog, let’s now venture into the empowering Warrior I pose. If you’re ready to channel your inner warrior, here’s a step-by-step guide on how to do Warrior I (Virabhadrasana I):
- Start in Mountain Pose (Tadasana). Take a big step back with your right foot, about the length of one of your legs.
- Turn your right foot out to about a 45-degree angle. Ensure your left foot is facing forward.
- Bend your left knee until it’s over your left ankle. Your hips should be squarely facing forward.
- Raise your arms above your head, reaching towards the sky. You may choose to bring your palms together or keep them shoulder-width apart.
- Gaze forward, or for more of a challenge, tilt your head back and look up at your hands.
- Remember, every warrior has their own style, so don’t be afraid to adjust the pose to suit your body.
Tips for Doing Warrior I
Moving from the grounding and rejuvenating Downward-Facing Dog, let’s now step into the empowering Warrior I pose. Here are some friendly tips to help you embrace and embody this pose wonderfully.
Engage Your Core: As with many yoga poses, your core is your powerhouse in Warrior I. Engaging your core helps to maintain balance and provides support to your spine. 😊
Align Your Hips: A common mistake in Warrior I is misalignment of hips. Aim to keep your hips square to the front of the mat. This might require a slight adjustment, but it helps in maintaining the right posture.
Press Down through Back Foot: Really ground yourself by pressing down through the outer edge of your back foot. This not only provides stability but also helps you get a deeper stretch in the pose.
Remember to Breathe: Lastly, don’t forget to breathe! Your breath is a fantastic tool for easing into the pose and staying grounded. Deep, steady breaths can really enhance your Warrior I experience.
Warrior II (Virabhadrasana II)
We’ll start by delving into the Benefits of Warrior II, highlighting why it’s a must-do pose. Next, we’ll guide you through How to do Warrior II, ensuring you get the posture right. To improve, our Tips for Doing Warrior II are invaluable. Don’t worry if you find it challenging, we have Modifications and Variations of Warrior II for all levels. Finally, learn how to seamlessly Incorporate Warrior II into Your Yoga Routine, enhancing your practice. Warrior II (Virabhadrasana II) is not just a pose, it’s a journey to self-discovery and strength.
Benefits of Warrior II
Just as Warrior I is a pose of strength and determination, its counterpart, Warrior II, continues to build upon these foundations while offering its own unique set of benefits. The Warrior II pose, or Virabhadrasana II, as it is known in Sanskrit, is a wonderful addition to any yoga practice.
One of the primary benefits of Warrior II is the increased strength and endurance it brings to the legs and ankles. This pose also stretches your hips, groins, and shoulders, promoting flexibility and improved circulation. What’s more, the balance required in Warrior II can significantly enhance your stability and concentration, giving you a better sense of grounding.
Furthermore, Warrior II is great for your respiratory system. It encourages deep, mindful breathing, which can help reduce stress and calm the mind. Finally, as a chest-opening pose, it can also stimulate your abdominal organs, potentially improving digestion and overall health.
So, whether you’re a seasoned yogi or a beginner, Warrior II can offer you a plethora of physical and mental benefits.
How to do Warrior II
Building on the strength and stability you’ve gained through Warrior I, let’s move into Warrior II, a pose that offers a deeper stretch and more intense focus. Here’s a step-by-step guide on how to do Warrior II:
To begin, stand at the top of your mat, with your feet hip-width apart. Step your left foot back about three to four feet and pivot it out to about a 90-degree angle. Your right foot should point directly forward. Extend your arms out to the sides, parallel to the floor, reaching in opposite directions. Bend your right knee until it is directly over your right ankle, forming a right angle. Your gaze should be over your right fingertips, embodying the warrior’s focus.
Remember, this pose is about finding balance and strength, so take your time and don’t rush. Breathe deeply and steadily, allowing your body to settle into the pose. Enjoy the journey as you expand your yoga practice.
Tips for Doing Warrior II
Extending from the power and strength cultivated in Warrior I, you’ll find Warrior II adds a new layer of balance and awareness. Now, let’s delve into some essential tips to consider when practicing Warrior II.
Keep your front knee above your ankle. This is crucial to protect your knee from injury and to engage the right muscles. Also, ensure that your front knee is pointing towards your second toe. Engage your core to maintain proper posture and balance. Rotate your back foot at a 90-degree angle, with your heel in line with the arch of your front foot. This will help with stability.
Remember to breathe deeply. Each exhale is an opportunity to sink more deeply into the pose. Lastly, keep your gaze forward, focusing on your outstretched hand. This helps with balance and also invites a sense of determination into your practice.
Keeping these tips in mind will ensure a safe and effective Warrior II practice!
Tree Pose (Vrksasana)
Starting with the Benefits of Tree Pose, we’ll explore how this classic yoga posture can improve your physical and mental well-being. Then, we’ll guide you in How to do Tree Pose step-by-step. To enhance your practice, we’ll provide some handy Tips for Doing Tree Pose. Need some adjustments? No worries, we’ll discuss the Modifications of Tree Pose and tailor it to your needs. Lastly, ensuring you practice safely is our top priority, so we’ll cover the necessary Precautions for Tree Pose. Let’s get started with the journey into the peaceful world of Vrksasana!
Benefits of Tree Pose
Transitioning from the dynamic energy of Warrior II, we now enter the serene tranquility of the Tree Pose. Embodying the strength and grace of a tall standing tree, this pose offers numerous benefits to the practitioner. Firstly, Tree Pose is a superb posture to build balance and stability in the legs, as it requires you to stand on one foot. The pose also strengthens the ankles, calves, and thighs while stretching the groins and inner thighs. Additionally, Tree Pose is a wonderful way to improve posture and alignment, as it encourages a straight spine and open chest. This pose also helps to boost concentration and focus, as it requires a steady gaze and mind. Moreover, by mimicking the peacefulness and steadiness of a tree, Tree Pose can help to promote calmness, reducing stress and anxiety. So, embrace the tranquility and balance of Tree Pose, and reap its myriad benefits.
How to do Tree Pose
Shifting our stance from the power and vigor of Warrior II, we now transition to a pose that tests our balance and steadiness – the Tree Pose. Here’s a friendly guide on how to do the Tree Pose.
Start by standing in Mountain Pose with your feet hip-distance apart and your arms by your sides. Shift your weight onto your right foot, and draw your left foot up to rest against your right inner thigh. If this is too challenging, you can rest your foot on your calf, but avoid placing it directly on the knee.
Now, bring your hands together in prayer position at your chest, or extend them upward like the branches of a tree. Look straight ahead and focus on an unmoving point to help maintain balance. Take deep, steady breaths, maintaining this pose for 30 seconds to a minute. Slowly lower your arms and foot to return to Mountain Pose, and then repeat on the other side.
Tips for Doing Tree Pose
To assist you in perfecting your Vrksasana, here are some friendly tips.
Firstly, always start with a strong and connected base. Just like a tree, your foot rooted to the ground is your foundation. Secondly, try to maintain your balance by fixing your gaze on a non-moving spot in front of you. This is known as your drishti, or focal point.
Remember, it’s absolutely okay if you sway a bit – after all, trees sway in the wind too! The key is to stay focused and return to your center.
Another helpful hint is to press your foot into your thigh and your thigh back into your foot. This mutual pressure creates a balance of forces and promotes stability.
Finally, don’t forget to breathe. Imagine your breath as the wind rustling through the leaves of your tree. Happy posing!
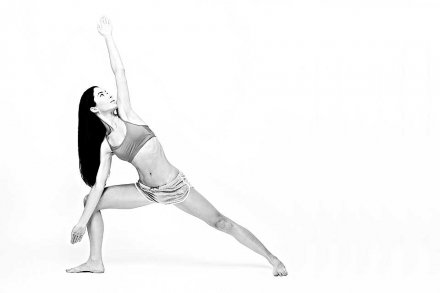
Triangle Pose (Trikonasana)
Let’s delve into the Triangle Pose (Trikonasana), starting with its benefits. After that, we’ll guide you step-by-step on how to do Triangle Pose. We’ll also share some handy tips to perfect this pose. To accommodate varying skill levels, we’ll discuss modifications and variations. Lastly, we’ll focus on the breathing pattern during the pose for a holistic yoga experience.
Benefits of Triangle Pose
The Benefits of Triangle Pose are simply amazing! This pose is a true full-body stretch that engages every part of your body. It’s a great way to open and expand your chest, shoulders, and hips, while also strengthening your legs and core. If you struggle with stress or anxiety, Trikonasana can help you find emotional balance and mental clarity. It’s also known for stimulating the digestive system and improving metabolism. Does your job involve you sitting for long hours? This pose can be a great remedy for back pain and sciatica. So, Triangle Pose is not just about physical fitness, it’s about total wellness. Embrace this pose to feel more grounded, balanced, and refreshed!
How to do Triangle Pose
Moving on from the balance and stability of Tree Pose, let’s now explore the expansiveness of Triangle Pose. Here’s a friendly guide on how to do Triangle Pose.
- Stand tall at the top of your mat, feet hip-width apart, arms by your sides. This is known as Mountain Pose.
- Take a big step back with your right foot, about 3 to 4 feet apart. Turn your right foot out 90 degrees, aligning your right heel with your left heel.
- Extend your arms out to the sides, reaching them actively from fingertip to fingertip.
- Bend from your hips towards your right side, reaching your right hand down towards your right foot, keep your left arm reaching up. Look up towards your left fingertips.
- Keep your body extended as if pressed between two panes of glass.
- Hold for up to 30 seconds, breathing deeply. To release, press down into your feet and lift your torso. Repeat on the other side.
Tips for Doing Triangle Pose
Let’s delve into some helpful tips for performing this pose correctly.
Firstly, the alignment of your body is crucial. Always make sure that your chest, waist, and hips are facing forward. Also, remember that your front foot should be turned out 90 degrees while your back foot is slightly inwards.
Secondly, engage your core and leg muscles. This not only helps you maintain balance but also enhances the benefits of the pose.
Thirdly, your gaze plays a significant role in Triangle Pose. Steadily look up towards your raised hand, as this will help improve your focus and balance.
Lastly, don’t forget to smile. Yoga is not just about the physical workout but also about enjoying the journey. So, keep the positivity flowing throughout your practice.
By following these tips, you can maximize the benefits of Triangle Pose while minimizing the risk of injury.
Cat-Cow Pose (Marjaryasana-Bitilasana)
The Cat-Cow Pose (Marjaryasana-Bitilasana) is not only a fun stretch but it also offers numerous benefits. Let’s delve into the advantages of this pose first. Once you’re convinced of its benefits, we’ll guide you step-by-step on how to do the Cat-Cow Pose. To make your practice even more effective, we’ve got some helpful tips. Beware of the common mistakes that beginners often make during this pose. Lastly, we will provide modifications and variations to cater to different fitness levels and body conditions.
Benefits of Cat-Cow Pose
This pose encourages an intimate connection with your breath, as your body ebbs and flows in response to each inhalation and exhalation.
But the benefits of Cat-Cow Pose extend well beyond this breath-body connection. This gentle, accessible pose is a wonderful way to warm up the spine, making it a perfect preamble to more challenging poses. It also helps to relieve tension in the lower back, neck, and shoulders – areas where many of us tend to store stress. Additionally, the Cat-Cow Pose improves the health of your internal organs by stimulating the kidneys and adrenal glands. Remarkably, it even aids in emotional balance by calming the mind and reducing stress.
How to do Cat-Cow Pose
Here’s a friendly guide on how to perform the Cat-Cow Pose:
Start by coming onto your hands and knees, aligning your wrists directly under your shoulders and your knees under your hips. As you inhale, lift your chest and tailbone towards the ceiling, allowing your belly to sink towards the floor in the Cow Pose. As you exhale, draw your belly to your spine and round your back towards the ceiling like a cat, which is the Cat Pose.
This pose is all about fluidity. So, remember to move gently between each pose as you breathe. The key is to sync your movements with your breath. This pose is like a dance, where your body is swaying to the rhythm of your breath. Enjoy this calm and soothing flow!
Tips for Doing Cat-Cow Pose
Now, let’s delve into some helpful tips to make your Cat-Cow Pose (Marjaryasana-Bitilasana) even more beneficial.
While performing this pose, breathe deeply and rhythmically. The cat-cow pose is as much about the breath as it is about the physical movement. Coordinate your movement with your breath – inhale as you arch your back into cow pose, and exhale as you round into cat pose. This synchronisation can help deepen the stretch and promote relaxation.
Remember to keep your wrists directly under your shoulders and your knees directly under your hips. This alignment is crucial to protect your joints and maximize the pose’s benefits.
Finally, be patient with yourself. Don’t rush the process. The beauty of yoga is in the journey, not just the destination. So, enjoy each movement and breathe!
Cobra Pose (Bhujangasana)
The Cobra Pose, or Bhujangasana, is a gem in the yoga world. First, we will delve into its numerous benefits, promoting physical and mental well-being. Next, we will guide you step-by-step on how to do this pose, followed by some helpful tips to enhance your Cobra Pose experience. For beginners, don’t worry! We have a special section just for you. Lastly, we will discuss how to seamlessly incorporate the Cobra Pose into your daily yoga routine. So, let’s embark on this journey together!
Benefits of Cobra Pose
The benefits of Cobra Pose (Bhujangasana) are numerous and can greatly enhance your overall wellbeing.
Now, you might be wondering, what’s so special about the Cobra Pose? Well, this pose strengthens your spine, stretches your chest, lungs, shoulders, and abdomen, and can also firm your buttocks. It’s fantastic for relieving stress and fatigue as well, making it a perfect addition to your routine after a long day.
And here’s the cherry on top, it even helps in improving your digestion. If you’re trying to improve your posture, you’ll be happy to know that the Cobra Pose aids in maintaining the health of your spine and promoting a tall, proud posture. In addition, it can help in soothing sciatica and can be therapeutic for asthma. What a versatile pose, isn’t it?
How to do Cobra Pose
Here’s how to do the Cobra Pose:
- Lie face down on your yoga mat with your palms flat, nestled directly under your shoulders.
- Keep your legs close together, all toes touching the mat. Your forehead should also be resting on the mat.
- Inhale deeply, and as you exhale, press your palms into the mat and slowly lift your head, chest, and abdomen while keeping your navel on the floor.
- Pull your shoulders back and down, away from your ears.
- Make sure your distribution of weight is even throughout your palms and tops of your feet.
- Hold this position for about 15 to 30 seconds, breathing easily.
- Exhale and gently lower yourself back onto the mat.
Remember, it’s not about how high you can lift but about elongating your spine.
Tips for Doing Cobra Pose
Here are a few friendly tips to help you perfect your Bhujangasana! 😊
First, always remember to keep your shoulders relaxed. This tip is crucial as tensed shoulders can lead to unnecessary strain. Second, be mindful of your neck. Avoid craning it backward too much. Instead, keep it aligned with your spine for a smoother pose.
Third, engage your back muscles and not just your arms. This helps to deepen the pose and strengthens your back. Also, remember that your hips should remain on the ground, so avoid lifting them up.
Lastly, listen to your body! If something feels uncomfortable, ease out of the pose. Yoga is about balance and harmony, not competition or strain. Always take things at your own pace and enjoy the journey. With these tips, your Cobra Pose will definitely be a hiss-terical success!
Corpse Pose (Savasana)
Let’s delve into the world of Corpse Pose (Savasana), starting with its benefits. Next, we’ll step-by-step explore how to do Corpse Pose, followed by some crucial tips to perfect your pose. For beginners, we’ve got a special section discussing Corpse Pose for beginners. Lastly, we will discuss how to incorporate Savasana into your yoga routine for maximum relaxation.
Benefits of Corpse Pose
After shedding the intensity and heat of the Cobra Pose, let’s journey into the calming tranquility of the Corpse Pose, also known as Savasana. This pose might seem simple, but it’s packed with a host of benefits.
Firstly, Savasana is a great stress-buster. It helps you to release tension and anxieties that accumulate throughout your day. By lying still and focusing on your breath, you allow your mind to quieten and your body to relax.
Secondly, it has restorative properties that rejuvenate your body. It helps lower the heart rate, reduces blood pressure, and aids in digestion.
Finally, this pose also enhances self-awareness and concentration. It encourages mindfulness and paves the way for a deeper understanding of your bodily sensations and thought patterns.
In a nutshell, Savasana is not just about lying down at the end of your yoga session. It’s about embracing stillness and cultivating peace within you.
How to do Corpse Pose
This pose may seem simple, but it involves much more than just lying on the floor.
To begin, lie flat on your back on your yoga mat. Let your legs fall open naturally, about hip-width apart, and relax your arms by your sides with your palms facing upwards. Close your eyes and take a moment to settle into your body. Allow your body to sink into the floor, releasing any tension in your muscles.
Take deep, slow breaths, focusing on the rise and fall of your abdomen. Let your mind quieten and your thoughts drift away. Don’t worry about doing it perfectly. The goal here is relaxation and rejuvenation.
Remember, Savasana is a pose of total relaxation. So, give yourself permission to let go and enjoy this peaceful moment.
Tips for Doing Corpse Pose
We now enter the serene stillness of Savasana, also known as the Corpse Pose. Let’s explore some helpful tips on how to perfect this pose.
Firstly, it’s essential to get comfortable. This pose is all about deep relaxation so make sure you’re lying on a flat surface and wear comfortable clothing. Secondly, keep your body symmetrical. Your legs should be hip-width apart and your arms resting by your sides. Remember to release tension from every muscle. It’s a common mistake to carry tension, especially in the forehead and jaw, so consciously relax your face.
As Savasana is all about stillness, try to resist the urge to move or fidget. Lastly, focus on your breath. It’s your anchor during this pose. Your eyes should be closed, inviting inward focus.
Remember, Savasana might seem simple but it requires practice, like all other poses.
Closing Meditation
Incorporating these essential yoga poses into your routine can tremendously boost your physical and mental health. These yoga postures not only improve flexibility and strength, but also promote mindfulness and relieve stress. Give them a try and surely you will enjoy the amazing benefits of yoga.
Remember, it isn’t about perfecting these yoga poses, it’s about the journey of self-exploration and growth. Each pose offers a unique experience, so embrace the process and continue to evolve in your yoga journey. Keep practicing and stay healthy!
0