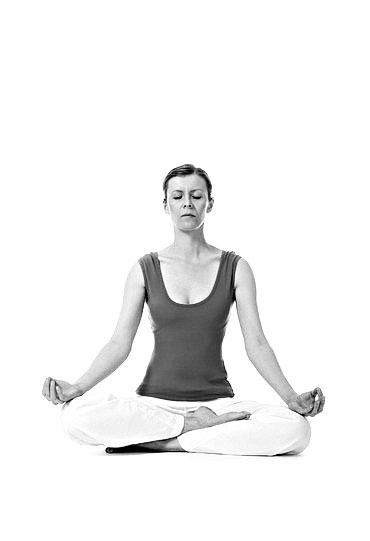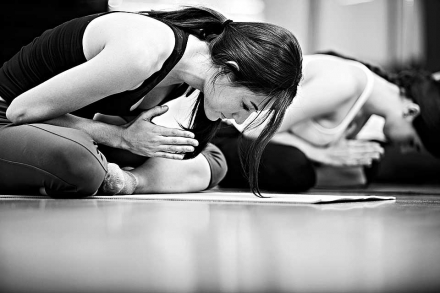
Ever wondered how to get a full-body workout without hitting the gym? Well, look no further than your yoga mat. Yoga sequences can be your secret weapon to achieving a toned and fit body right from the comfort of your home. Yoga isn’t all about deep breathing and achieving zen; it can also be a great way to strengthen your muscles, increase flexibility, and boost your overall fitness. Plus, it’s the kind of workout you can do in your pajamas. Talk about a win-win situation!
Now, before you start imagining yourself in complicated poses resembling a pretzel, let me ease your mind. Yoga for a full-body workout doesn’t require you to be a human rubber band. Whether you’re a beginner or a seasoned yogi, there are sequences designed to target every muscle group in your body. So, roll out your mat, grab a comfortable pair of leggings, and prepare to engage in a workout that not only strengthens your body but also calms your mind.
Benefits of Full-Body Yoga
Full-body yoga not only strengthens and enhances your flexibility, it also promotes endurance and balance. The benefits don’t stop there; it’s a wonderful tool to alleviate stress and anxiety. Moreover, yoga boosts your stamina and endurance, making day-to-day activities easier. Another perk of this holistic exercise is weight loss and toning, transforming your body into a lean, strong, and flexible masterpiece. Embrace yoga, enjoy these myriad benefits, and lead a healthier, happier life.
Improve Strength and Flexibility
As we gracefully glide from understanding the essence of yoga, let’s now delve into the wonderful benefits it brings to our bodies. One of the most significant benefits is its ability to improve strength and flexibility.
Have you ever admired the strength of a dancer or the flexibility of an acrobat? With regular full-body yoga, you can develop those qualities too! Yoga poses or asanas work on various muscle groups, helping you build strength in a balanced way. Unlike weight training, which focuses primarily on specific muscles, yoga engages both your primary and secondary muscle groups, promoting overall strength.
Moreover, yoga encourages flexibility. Each pose is designed to stretch your muscles and increase your range of motion. Over time, you could find yourself touching your toes with ease, a feat you once thought impossible.
So, don’t be surprised when you discover that you’re stronger and more flexible after a few weeks of full-body yoga. It’s a wholesome way to keep the body supple and robust.
Increase Endurance and Balance
Let’s now focus on how full-body yoga can significantly increase your endurance and balance. Yoga isn’t just about stretching and flexibility; it’s also a fantastic way to build your body’s endurance. By holding poses for extended periods, you’re training your body to withstand physical stress over time. This can translate into better performance in other physical activities and even in your day-to-day life.
Next, on the balance front. Yoga poses require a great deal of balance, which fortifies your core and improves your overall stability. Don’t worry if you find balancing challenging at first. Remember, it’s a journey, and every yoga session helps you improve. With consistent practice, you’ll find your balance getting better, and watch out, it’s also a great confidence booster!
So, whether you’re looking to run longer, stand taller, or simply move through life with a bit more grace and stability, full-body yoga has got you covered, my friend!
Reduce Stress and Anxiety
Making our way from physical benefits, let’s now delve into the profound impact yoga has on our mental well-being, particularly in reducing stress and anxiety.
Yoga is much more than just physical exercise; it’s a holistic approach to health and well-being that focuses on the mind-body connection. Practicing yoga regularly can significantly reduce stress and anxiety. How, you ask? The key lies in the breathing exercises and meditation that are integral parts of yoga. These elements promote a state of calm and relaxation, helping you to release tension and anxiety.
Moreover, yoga encourages you to stay present and mindful, rather than getting lost in anxiety-inducing thoughts about the past or future. It’s like a mini-vacation for your mind, a much-needed break in today’s fast-paced world.
As you move through the poses, focusing on your body and breath, you cultivate a sense of inner peace and tranquility that extends beyond the yoga mat and into your day-to-day life.
Tips for Creating a Yoga Sequence
To create a fulfilling yoga sequence, start by choosing the right poses that match your skill level and goals. Next, focus on your breath and movement to maintain a smooth flow. Don’t forget to adjust the intensity level to suit your physical capacity. Incorporating transitions between poses will ensure a seamless progression. Lastly, concoct your sequence keeping specific goals in mind, whether it’s flexibility, strength, or relaxation.
Choose the Right Poses
Basking in the benefits of a full-body yoga practice, you may be inspired to create a personal sequence. Let’s dive into the first component: Choosing the Right Poses.
Selecting poses for your sequence depends on your personal goals and current fitness level. If you’re a beginner, start with basic poses like Mountain Pose, Downward Dog, and Child’s Pose. As you become more comfortable, you can add more challenging poses such as the Warrior series and inversions.
It’s important to have a balance of poses that strengthen, stretch, and relax your body. For instance, for every strong pose like Plank, pair it with a relaxing pose like Child’s Pose to give your body a chance to rest.
Remember, every body is unique. Listen to your own body and modify poses as necessary. You’re not competing with anyone; you’re simply working towards a healthier, happier you.
In the next section, we’ll delve into how to focus on breath and movement in your yoga sequence.
Focus on Breath and Movement
Now that you’ve understood the benefits of full-body yoga, let’s turn our attention to creating your own yoga sequence. A crucial aspect to bear in mind is to focus on breath and movement.
Breath is the foundation of yoga. It’s the rhythm that guides your movement and helps you deepen each pose. So, always begin your sequence by establishing a steady, rhythmic breath. Then, let your movements flow naturally with each inhale and exhale.
Remember, yoga isn’t about nailing a perfect pose; it’s about the journey your body and mind undertake together. So, tune into the ebb and flow of your breath and let it guide your movements.
Additionally, consider incorporating poses that involve dynamic movement. For instance, the Sun Salutation series is excellent for marrying breath and movement. The key is to embrace the rhythm of your own breath; it’s your most reliable yoga partner. Happy sequencing!
Adjust Intensity Level
After exploring the various benefits of full-body yoga, it’s time to delve into the nitty-gritty of constructing your own yoga sequence. A crucial aspect to consider is adjusting the intensity level of your routine.
Yoga is not a one-size-fits-all practice, and it’s essential to tailor intensity levels to your personal needs and capabilities. If you’re a beginner or recovering from an injury, opt for more gentle poses and slower transitions. Alternatively, if you’re an experienced yogi seeking a challenging workout, you can incorporate more advanced poses and quicker transitions.
Remember, yoga is about balance. If you’re feeling particularly sluggish one day, it might be best to stick to a more restorative practice. On more energetic days, feel free to ramp up the intensity. Always listen to your body and adjust accordingly. It’s this flexibility that makes yoga such a versatile and beneficial practice.
Sequence Ideas for Beginners
Starting with the energizing Surya Namaskara (Sun Salutation), we’ll learn the basics of this vital sequence. Next, let’s delve into the empowering Warrior Pose and how it can boost your confidence. Our third focus will be the grounding Tadasana (Mountain Pose), a fundamental posture in yoga. Following this, we’ll explore a Yoga Sequence for Strength, perfect for building physical and mental resilience. Lastly, we’ll get your whole body moving with some Effective Yoga Sequences for a Full-Body Workout. Ready to start your yoga journey? Let’s dive in!
Surya Namaskara (Sun Salutation)
Having just explored the art of creating your own yoga sequence, let’s delve into a few specific poses and sequences that are perfect for beginners. First up, let’s explore the Surya Namaskara or the Sun Salutation.
The Sun Salutation is a wonderful way to start your yoga routine. It comprises a series of 12 distinct poses, each flowing smoothly into the next. This sequence not only stretches and strengthens your muscles but it also helps to improve your cardiovascular fitness and overall flexibility.
Start with a calm and collected Tadasana, or Mountain Pose, and then transition through a series of bends, stretches, and lunges. The final pose is a return to the Tadasana, bringing the sequence full circle.
Remember, yoga is not about perfection but about progression. As you practice the Sun Salutation more and more, you’ll find the sequence becoming smoother and more natural. Happy practicing!
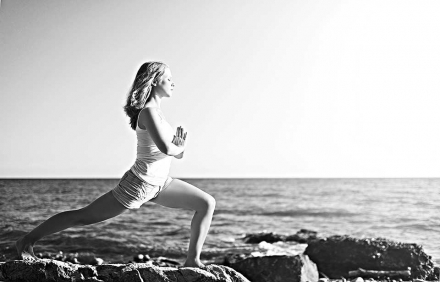
Warrior Pose
Transitioning from the basic tips for creating your yoga sequence, let’s dive deeper into specific poses that are great for beginners. The Warrior Pose is a classic in yoga that offers many benefits.
The Warrior Pose, also known as Virabhadrasana, is a perfect pose to start with. This pose not only strengthens your legs, shoulders, and arms but also improves your focus and balance. It’s a standing pose that stretches your whole body while helping you feel grounded and powerful, just like a warrior!
To do the Warrior Pose, start in Tadasana (Mountain Pose). Step your feet wide apart, turn your right foot out, and angle your left foot slightly inward. Bend your right knee, ensuring it’s directly above your right ankle, extend your arms out to the sides, and gaze forward over your right hand.
Remember to breathe deeply and hold the pose for a few moments before switching sides. You’re doing great!
Tadasana (Mountain Pose)
As we transition from the basics of crafting a yoga sequence, let’s dive into a crucial pose for beginners: the Tadasana or Mountain Pose. This pose is fundamental to yoga practice, providing a strong foundation for many other asanas (yoga poses).
To begin your Tadasana, stand tall with your feet hip-width apart, spreading your toes wide for stability. Draw your shoulders back and down, and let your arms relax by your sides – this is where the pose gets its name, as you should resemble a sturdy, unshakeable mountain. Remember to engage your core muscles, keeping a neutral spine. Breathe deeply, focusing on drawing energy up from the earth with each inhalation, while grounding yourself with every exhalation.
Mastering the Mountain Pose is an excellent way to improve posture, balance, and body awareness. It’s a wonderful starting point for any yoga sequence, especially for beginners. Embrace the stillness and strength of this pose, and feel your confidence soar!
Sequence Ideas for Intermediate Level
Moving on to intermediate-level yoga, let’s delve into a few specific poses. First, Ustrasana (Camel Pose), a backbend that boosts spinal flexibility. Next, the balancing Vriksasana (Tree Pose), which cultivates focus and stability. Then, Adho Mukha Svanasana (Downward Facing Dog), a pose that strengthens and stretches the whole body. Following these poses, we’ll explore Yoga Sequences for Flexibility, to further enhance your mobility. Lastly, the Yoga Sequences for Toning Muscles will help you build strength and definition.
Ustrasana (Camel Pose)
Building upon the basic yoga sequences we’ve covered, let’s dive into some intermediate poses that not only improve your flexibility, but also work towards toning your muscles. First up, we have the Ustrasana or Camel Pose.
This pose is a wonderful back-bend that stretches the entirety of your front body, including your chest and abdomen. It’s perfect for counteracting long hours spent hunched over a computer! To perform the Camel Pose, kneel upright with your knees hip-width apart. Slowly reach back and place your hands on your heels, creating a beautiful arch in your spine. If this is too intense, you can tuck your toes to elevate your heels.
Remember, achieving the pose perfectly isn’t the goal – listening to your body and moving at your own pace is. So, take your time and enjoy the journey. The Camel Pose is a fantastic way to enhance your overall flexibility while also strengthening your back and shoulders.
Vriksasana (Tree Pose)
Having successfully mastered some beginner moves, you’re now ready to branch out and reach new heights in your yoga practice. Let’s delve into the Vriksasana, also known as the Tree Pose.
Vriksasana is a balancing pose that emulates the graceful, steady stance of a tree. To perform this pose, begin by grounding yourself on one foot and then slowly raise the other foot and place it against the inner thigh of the grounded leg. Extend your arms upwards like the branches of a tree, and maintain a steady gaze.
This pose not only improves balance and stability, but also strengthens the thighs, calves, ankles, and spine while stretching the inner thighs, groin, chest, and shoulders. It’s a wonderful pose to help you feel grounded and connected with the earth. Remember, like a tree, you are strong and steadfast. You are growing every day in your yoga journey. Enjoy the calm and serenity this pose brings.
Adho Mukha Svanasana (Downward Facing Dog)
Stepping up from the basics, let’s now dive deeper into some intermediate-level poses, beginning with Adho Mukha Svanasana or the Downward Facing Dog. This pose is a staple in many yoga sequences and for good reason.
The Downward Facing Dog is a wonderful pose that not only stretches your entire body but also builds strength and improves circulation. To perform this pose, start on your hands and knees, tuck your toes and lift your hips high, reaching your tailbone towards the ceiling. Press your heels into the floor and relax your head between your arms, creating an inverted ‘V’ shape with your body.
This pose is a must-try for its multitude of benefits. It strengthens the arms and legs, improves digestion, relieves back pain, and calms the mind. Plus, it’s a great transition pose between other yoga sequences. So, get your mat out and give the Downward Facing Dog a go!
Sequence Ideas for Advanced Level
Let’s delve deeper into some Sequence Ideas for Advanced Level yoga practices. Starting with the Bakasana (Crow Pose), we’ll explore its nuances and benefits. Next, we’ll move to the dynamic Urdhva Dhanurasana (Wheel Pose), followed by the challenging Parivrtta Trikonasana (Revolved Triangle Pose). Delving into Advanced Backbend Sequences, we’ll push our flexibility and strength to the limits. Finally, we’ll get creative with Advanced Arm Balance Sequence Ideas to test our stability and control. Happy yoga-ing!
Bakasana (Crow Pose)
Let’s soar higher on our yoga journey, leaving the intermediate level behind and embracing the advanced level with open arms and hearts. Our first stop is Bakasana, also known as the Crow Pose.
Bakasana is an arm-balance posture that requires both strength and balance. This pose is like a bird taking flight, your hands become the feet and your feet lift off the ground. It’s a fun pose that can make you feel empowered and strong. To get into Bakasana, you will start in a squat, place your hands flat on the ground in front of you, and then, with a strong core, lift your feet off the ground while balancing on your hands.
Remember, it’s not about perfection, but about the journey. So, don’t be discouraged if you wobble or fall. Just like a baby bird learning to fly, you’re building your wings! Keep practicing, and you’ll soon be soaring in your Crow Pose!
Urdhva Dhanurasana (Wheel Pose)
Bidding farewell to the intermediate level, let’s now venture into the exhilarating world of advanced yoga! Our first stop is the challenging but rewarding Urdhva Dhanurasana, also known as the Wheel Pose.
This pose is a deep backbend, requiring strong arms and legs, flexibility in the spine, and an open chest. It’s not just about physical strength; it also calls for a lot of courage and determination. The Wheel Pose opens up your heart, energizes your body, and invigorates your mind.
Start on your back, bend your knees and place your feet flat on the ground, close to your buttocks. Place your hands beside your head with fingers pointing towards your shoulders. Press down with your feet and hands, lift your body off the floor, and try to straighten your arms and legs as much as you can. Remember, it’s not about how high you can go, but rather, the journey there. Practice safely, and remember to breath!
Parivrtta Trikonasana (Revolved Triangle Pose)
Gently stepping out of the intermediate realm, let’s venture into the more advanced territory. Our first stop is Parivrtta Trikonasana, also known as the Revolved Triangle Pose. This is a delightful pose that truly tests your balance, flexibility, and strength all at once.
Begin in a standing position, with your feet hip-width apart. Step your left foot back around three to four feet, and turn your left foot out about 45 degrees. Reach your right hand up and then down to the outside of your left foot, twisting your torso to the left. Extend your left hand towards the ceiling, keeping your gaze fixed on your left hand. The Revolved Triangle Pose strengthens the legs, improves spinal flexibility, and stimulates the abdominal organs.
Remember, yoga is not about perfecting the pose, it’s about connecting with your body and breath. So, enjoy the journey, even when the poses get more challenging!
Sequence Ideas for Restorative Yoga
Let’s explore some great sequence ideas for Restorative Yoga! We’ll start with the calming Savasana, also known as Corpse Pose, then transition into the relaxing Supta Baddhakonasana or Reclined Bound Angle Pose. Next, we’ll delve into the peaceful Supta Virasana, the Reclined Hero Pose. From there, we’ll discuss Creating a Restorative Yoga Flow, where we’ll learn how to merge these poses smoothly. Lastly, we’ll take on some Advanced Restorative Yoga Sequences for those wanting a bit more challenge. So, let’s get started!
Savasana (Corpse Pose)
Shifting gears from the adrenaline-rushing advanced sequences, let’s now dive into the calming waters of restorative yoga. The first stop is the Savasana, also known as the Corpse Pose.
Savasana is a pose of total relaxation, making it one of the most challenging asanas. It’s all about releasing tension and sinking into the floor. To practice Savasana, lie flat on your back, let your feet fall wide and rest your arms at your sides, palms facing upward. Close your eyes, breathe naturally, and let your body relax.
This pose is usually performed at the end of your yoga practice but with restorative yoga, we make it a central part of the sequence. This helps prepare the mind and body for deeper meditative states, promoting relaxation and stress relief. Remember, Savasana is not about perfecting the pose, but about letting go and finding tranquility within yourself.
Supta Baddhakonasana (Reclined Bound Angle Pose)
Transitioning from our discussion on advanced level sequences, let’s delve into a gentler, yet profoundly restorative pose: Supta Baddhakonasana, also known as the Reclined Bound Angle Pose. This pose is renowned for its calming effects on the mind and body. To perform Supta Baddhakonasana, begin in a seated position. Bring the soles of your feet together, forming a diamond shape with your legs. Slowly recline backward, maintaining the position of your legs. Your arms can rest comfortably by your sides or on your belly. Hold this pose for several minutes, focusing on deep, steady breaths. This pose is wonderful for opening the hips and quieting the mind, making it a perfect inclusion in any restorative yoga sequence. So, if the advanced sequences felt intense, Supta Baddhakonasana offers a soothing counterbalance. Remember, yoga is about union and balance, and even in a restorative practice, this principle holds.
Supta Virasana (Reclined Hero Pose)
Graduating from the challenging sequences of advanced yoga, let’s slow down and nurture our bodies with restorative yoga poses. Here, we’ll explore the Supta Virasana or Reclined Hero Pose.
This restorative pose is a wonderful way to gently stretch your thighs, knees, and ankles while also expanding your chest and abdomen. To begin, sit in Virasana and then, with the support of your hands, gently recline backward until your back rests on the floor. Your knees should remain on the ground, and your arms spread wide at your sides.
You might find this pose a bit challenging at first, but with regular practice, it gets easier and even more relaxing. Remember, it’s perfectly okay to use props like bolsters or folded blankets for extra support. So, don’t rush; take your time and enjoy the calming effects of the Supta Virasana. As you let your body relax into the pose, you’ll feel a deep sense of peace and rejuvenation.
Tips to Maximize Benefits
To maximize benefits, blend active and restorative poses to keep your body balanced. Make sure to focus on different areas of the body to ensure overall strength and flexibility. Don’t forget the mind-body connection, so incorporate meditation and pranayama into your practice. Consistency is key, hence, regular practice is recommended. Also, utilizing yoga props can help in correctly performing the poses and preventing injuries. These tips can greatly enhance your yoga journey.
Balance Active and Restorative Poses
Now that you’re armed with some wonderful sequence ideas for restorative yoga, let’s focus on how to maximize the benefits of your practice. The first tip to enhance your yoga journey is to balance active and restorative poses.
Active yoga poses keep your body engaged, enhance flexibility, and improve strength. In contrast, restorative poses provide relaxation and rejuvenation. Balancing both is like creating a symphony of energy and peace within your body. Consider starting with active poses to warm up your body, and then transition into restorative poses to cool down and relax.
Remember, it’s not a competition between the two. It’s about achieving a harmonious balance where you engage, stretch, relax, and rejuvenate your body seamlessly. Think of it as a dance, where active poses are the energetic beats and restorative poses are the calming rhythm, and your practice is the beautiful performance. Don’t be afraid to listen to your body and adjust your routine accordingly.
Focus on Different Areas of the Body
Just as a beautifully composed symphony has diverse notes and beats, your restorative yoga practice should also focus on different areas of the body. It’s not just about perfecting that lotus pose or mastering the downward dog. Yoga is a holistic practice that seeks to bring harmony and balance to your entire being.
Each yoga pose is designed to work on a specific part of your body. For instance, the camel pose helps stretch the chest and the abdominals, while the child’s pose focuses on your lower back and hips. Alternating between different poses ensures that you are giving equal attention to all your body parts.
Remember, yoga is not a competition. It’s okay if you can’t perform all poses to perfection. What’s important is to listen to your body, understand its limitations, and gradually push those boundaries. So, in your next yoga session, make it a point to consciously focus on different areas of your body. Happy practicing!
Incorporate Meditation and Pranayama
With your body now attuned to the gentle rhythms of restorative yoga, let’s delve deeper into the realm of holistic well-being. Another significant facet of maximizing the benefits of your practice is to incorporate meditation and pranayama.
Meditation and pranayama, or breath control, can help deepen your yoga practice by enhancing your ability to relax and focus. During your restorative yoga practice, try incorporating a few minutes of meditation at the beginning or end of the session. This can help clear your mind, reduce stress, and bring a sense of calm and serenity.
Pranayama, on the other hand, is all about controlling your breath. Techniques such as Ujjayi breath or Nadi Shodhana can be particularly beneficial in restorative yoga. They help regulate your body’s energy flow, relax your nervous system, and increase your awareness of the mind-body connection.
Remember, the ultimate goal is to create a balanced practice that nourishes both your body and mind.
Staying Motivated
Staying motivated in Yoga comes down to a few friendly tips. Set Practical Goals, because achievable targets foster motivation. Next, Track Progress – it’s amazing to see how far you’ve come! Don’t forget to Celebrate Successes; they’re mini milestones on your journey. Of course, there are always challenges, but Overcoming Challenges in Yoga is a testament to your resilience. Lastly, Staying Consistent in Practice ensures your motivation is kept alive. With these strategies, you’re set to maintain an enthusiastic yoga practice.
Set Practical Goals
After soaking in those wonderful tips to maximize your benefits from yoga, let’s glide smoothly into how to stay motivated on this journey. The first step to maintain momentum is to set practical goals. We all have high aims, and that’s fantastic, but it’s essential to be realistic and patient with ourselves. Yoga is a practice of mindfulness and patience, not competition or hurry. Start by setting small, achievable targets. Maybe it’s mastering a particular pose or committing to practice yoga for a certain number of days a week. Remember that progress in yoga isn’t just about how far you can stretch or how long you can hold a pose. It’s about developing your inner strength and balance. So, set goals that reflect this. In this way, you’ll experience the joy of achievement without burning out or getting disheartened. Stay tuned for more tips on staying motivated in your yoga journey!
Track Progress
Now that we’ve shared some valuable tips to maximize the benefits of your yoga practice, let’s move into our next section, which is all about staying motivated. Remember, motivation is the key to consistency and success in yoga.
One of the best ways to stay motivated is to track your progress. Start by jotting down your yoga routine, the postures you manage to hold, and how you feel after each session. This can be as simple as a note on your phone or a dedicated yoga journal. Over time, this will give you a clear picture of your journey, showing your improvements, strength gains, and increased flexibility. It’s always uplifting to look back and see how far you’ve come!
And don’t just track the physical improvements. Take note of your mental peace and calmness after each session. After all, yoga is about balance – achieving harmony between your mind, body, and spirit. Happy tracking!
Celebrate Successes
After maximizing your benefits with these tips, it’s time to keep the momentum going. It’s crucial to celebrate your successes to stay motivated in yoga. 😊
Remember, every little improvement in your yoga practice is a victory. Maybe you held a position for a few seconds longer, or perhaps you were finally able to touch your toes in a forward bend. Celebrate these accomplishments, no matter how small they may seem. They are proof that you are progressing and this will motivate you to keep going.
Take time to acknowledge your progress. You might want to treat yourself to a new yoga mat or a relaxing massage. Or maybe, you can simply enjoy a peaceful moment of gratitude for the progress you’ve made. These celebrations make your yoga journey more enjoyable and meaningful, encouraging you to stay motivated and consistent in your practice.
Safety Tips
Safety Tips are essential to prevent injuries. Firstly, Listen to Your Body, it often signals when something is off. Secondly, Warm Up and Cool Down; they prepare your body for exercise and help in recovery. Next, avoid Over-stretching. It’s important to stretch, yet pushing too hard can cause harm. Also, Correct Posture and Alignment ensures efficiency and prevents injuries. Lastly, avoid Overstretching again. Remember, consistency is key, not intensity.
Listen to Your Body
Just as we’ve talked about maintaining our motivation, it’s equally important to always keep safety at the forefront. Let’s dive into some essential safety tips that’ll ensure you keep enjoying your activities without any injury. The first and foremost advice is to Listen to Your Body.
Your body knows best! It’s fantastic to push yourself to achieve new fitness goals, but remember to pay attention to your body’s signals. If you feel any discomfort, pain, or excessive fatigue, it might be your body’s way of telling you to slow down or change your routine. Remember, it’s not about being the fastest or the most intense, it’s about being healthy and happy. So don’t ignore those little twinges and strains – they’re your body’s way of saying, “Hey, take it easy!” Just a friendly reminder, you’re in this for the long haul not a sprint so pace yourself and respect your body’s limits.
Warm Up and Cool Down
Just as we need the right mental attitude to keep going, we also need to ensure our physical wellbeing. So, let’s talk about how to keep our bodies in top form.
Warm Up and Cool Down are not just buzzwords – they’re essential components of safe and effective exercise routines. Picture this: you’re an athlete about to run a marathon. Would you start sprinting right off the bat? Of course not! You’d gradually increase your pace, letting your muscles get used to the idea of the strenuous task ahead. That’s what a warm-up is all about.
Similarly, after the race, you wouldn’t just plop down on the ground, would you? You’d gradually decrease your pace, allowing your body to recover. That’s the idea behind a cool-down. Both of these practices help prevent injury and improve performance. So, before you dive into your next workout, remember the importance of warming up and cooling down. Your body will thank you!
Avoid Over-stretching
While maintaining motivation for your workouts is key, it’s equally important to mind your physical safety. Let’s now shift our attention to another crucial aspect: Avoid Over-stretching.
Stretching is vital to keep your muscles flexible and healthy. However, overdoing it can lead to injuries. So, listen to your body. If you feel pain during a stretch, it’s your body’s way of telling you to ease up.
You might be enthusiastic about achieving your fitness goals, but pushing your body to its limits isn’t always the best approach. When stretching, aim for a feeling of gentle pull or mild discomfort, not pain.
Also, remember to maintain control. It’s not about how far you can stretch, but how well you can hold the stretch. Rapid, jerky movements can cause harm. Instead, slow, steady movements are the way to go.
So, smiling fitness enthusiasts, keep your stretches safe and effective to enjoy a healthy workout regime.
Conclusion
There’s no denying the effectiveness of yoga sequences in providing a comprehensive full-body workout. Whether you’re a beginner or an advanced yogi, nurturing your practice and integrating these sequences can revitalize your fitness journey, bringing you physical strength and inner harmony.
Always remember to stay safe and keep your body’s limitations in mind as you push your boundaries. Yoga isn’t about perfection, it’s a journey of self-discovery and healing. So, embrace these yoga sequences for a full-body workout and enjoy the ride!
0